With the integration of Vite, frontend development with the Mercury Template becomes significantly faster. Thanks to Hot Module Replacement, changes are immediately visible in the browser, without reloads or rebuilds.
Dev Blog:Front-end development in OpenCms with Vite
Date:
January 27, 2026
 AI generated")
Vite brings a modern, efficient development experience to OpenCms. Updates appear in real time for (S)CSS and JavaScript, reducing complexity and keeping the creative flow uninterrupted. With its lightweight setup and powerful live-reload capabilities, Vite redefines how front-end work is done in OpenCms. The result: less waiting, more creativity, and a more efficient way to customize the Mercury Template.
In the following article, we’ll walk through how to set up OpenCms and the Mercury Template for development with Vite. You’ll learn how to configure your project, connect it to the OpenCms workspace, and begin developing with instant feedback and modern front-end tooling. Once configured, you can enjoy a smooth, modern workflow that combines the power of OpenCms with the speed of today’s front-end ecosystem.
What is Vite?
Vite is a modern front-end build tool and development server designed to make web development faster and more efficient. Vite takes advantage of native ES modules in the browser to serve source files directly during development.
This means that changes are reflected in real time through Hot Module Replacement (HMR) without a full page reload. For more information about Vite, please visit the project website.
Prepare your environment for using Vite
Checkout the Mercury examples project
The Mercury examples repository can be downloaded or checked out from GitHub. In order to use Vite for local development, you have to checkout the repositoryt to your local file system. To do so, open a terminal window and change to your development folder where the Mercury examples project should be checked out to. Clone the repository by using the following command:
git clone https://github.com/alkacon/mercury-examples.gitThis checks out the master branch of the Mercury examples project. After that, switch to the project folder by typing:
cd mercury-examplesIf you want to start developing in your own branch like "myproject" starting from a specific tag version, e.g. Mercury version 20, enter the following command:
git checkout -b myproject tags/build_20_0_0This creates a new working branch named "myproject". You have now checked out the Mercury examples project and can start setting up your environment.
Install project dependencies
In order to be able to start the Vite proxy for Mercury, you have to install all necessary project dependencies.
Note: a recent version of NPM (Node Package Manager) already has to be installed on your development system.
Use again a terminal window and navigate to your Mercury examples project folder ("mercury-examples"). Enter the following command:
npm installThis installs the project dependencies specified in the package.json files and may take a while. Before continuing, please ensure that there are no errors thrown during the installation.
Change to the subfolder "demo-css" and install all dependencies for the workspace containing the custom CSS Vite demo files:
cd demo-css
npm install
After that, your project is ready for development.
Import the Vite example module in OpenCms
For this dev blog, a module with example pages to work with has to be imported to your development OpenCms system. We assume that you are running a local Docker image of OpenCms on your system as described in the previous blog article.
Please follow this instruction to import the demo page properly:
- Login to OpenCms as user with "Root administrator" role, e.g. "Admin".
- Switch to the "Mercury Default Demo" site.
- Change to the Launchpad and click on "Modules". In the toolbar, click the "Import module" icon.
- In the dialog, click the "Select file" button and select the module file "alkacon.mercury.template.examples.zip" in the "resources" folder of your Mercury Vite demo project.
- Click "OK" to start the import.
After the import, switch to the Page editor in the Mercury default demo. There should be a new main navigation entry named "Examples". Click on it and preview the "Custom CSS/JS demo" page.
Conventional workflow with custom CSS and JavaScript
To enable the customization for pages with the Mercury template, a sitemap attribute has to be added to a site or subsite configuration file located in ".content/.config". The attribute key is "template.allow.mods" with the value "true". After that modification custom files placed in the subsite folder will be additionally loaded by the Mercury template.
The custom CSS/JS demo page already uses custom CSS and JavaScript. Both files are placed directly in the imported "mercury-examples/custom-demo/" folder in OpenCms, named "custom.css" and "custom.js". They can be used to enhance the pages of the subsite.
To work on the files, you have to follow these steps:
- Switch to the Explorer view in OpenCms and locate the folder "mercury-examples/custom-demo/".
- Edit the files "custom.css" and "custom.js" by using the built in source code editor of OpenCms.
- After saving the changes, switch back to the page editor and check your changes in the preview.
With Vite configured as shown below, developing with these files will be much simpler and faster.
Configure the Vite environment
Note: for this blog, we will work in the subfolder "demo-css" of the Mercury examples project. All files and folders referred to are located in this subfolder.
Vite needs some information about the local environment and the OpenCms site to work with. This information is provided by the configuration file "vite.env.js" in the "demo-css" folder.
module.exports = {
    OPENCMS_VITE_SECRET: process.env.OPENCMS_VITE_SECRET || "??????????",
    OPENCMS_SERVER: process.env.OPENCMS_SERVER || "http://localhost:8080",
    OPENCMS_SITE: process.env.OPENCMS_SITE || "/sites/default/",
    OPENCMS_WORKSPACE: process.env.WORKSPACE + "/mercury-examples",
    OPENCMS_VITE_REPLACE_CUSTOM: true,
};
The necessary environment variables (OPENCMS_VITE_SECRET, OPENCMS_SERVER, OPENCMS_SITE, WORKPLACE) can be set in the users profile of your development system so that the original "vite.env.js" does not have to be modified. Alternatively, the configuration file can be directly changed.
The following variables have to be configured:
- OPENCMS_VITE_SECRET: The string entered here is used to prevent misuse and ensures that only an OpenCms user that has exactly the same secret string configured is able to use Vite for development. This configuration is done in the next step.
- OPENCMS_SERVER: Enter here the URL to your OpenCms workplace server, e.g. "http://localhost:8080" in case you are working with the local Docker image.
- OPENCMS_SITE: The root path of the OpenCms site to work with has to be entered here, e.g. "/sites/default/" for the Mercury default demo site.
- OPENCMS_WORKSPACE: Specify the absolute path to the workplace folder including the "mercury-examples" project folder, without trailing "/".
Note: the environment variable WORKSPACE (without OPENCMS_ prefix) used here has to be the absolute path to your workplace folder, without trailing "/". - OPENCMS_VITE_REPLACE_CUSTOM: set this to "true" to enable working with custom CSS or JavaScript of Mercury.
Set the Vite secret for an OpenCms user
To be able to use the Vite environment with a specific OpenCms user, this user has to provide the same secret String that is configured in the environment config file. To do so, you have to login to OpenCms as a user with "Root administrator" role, e.g. "Admin".
- Switch to the Launchpad and click on "Accounts".
- Click "Users" and locate the user you want to be able to work with Vite.
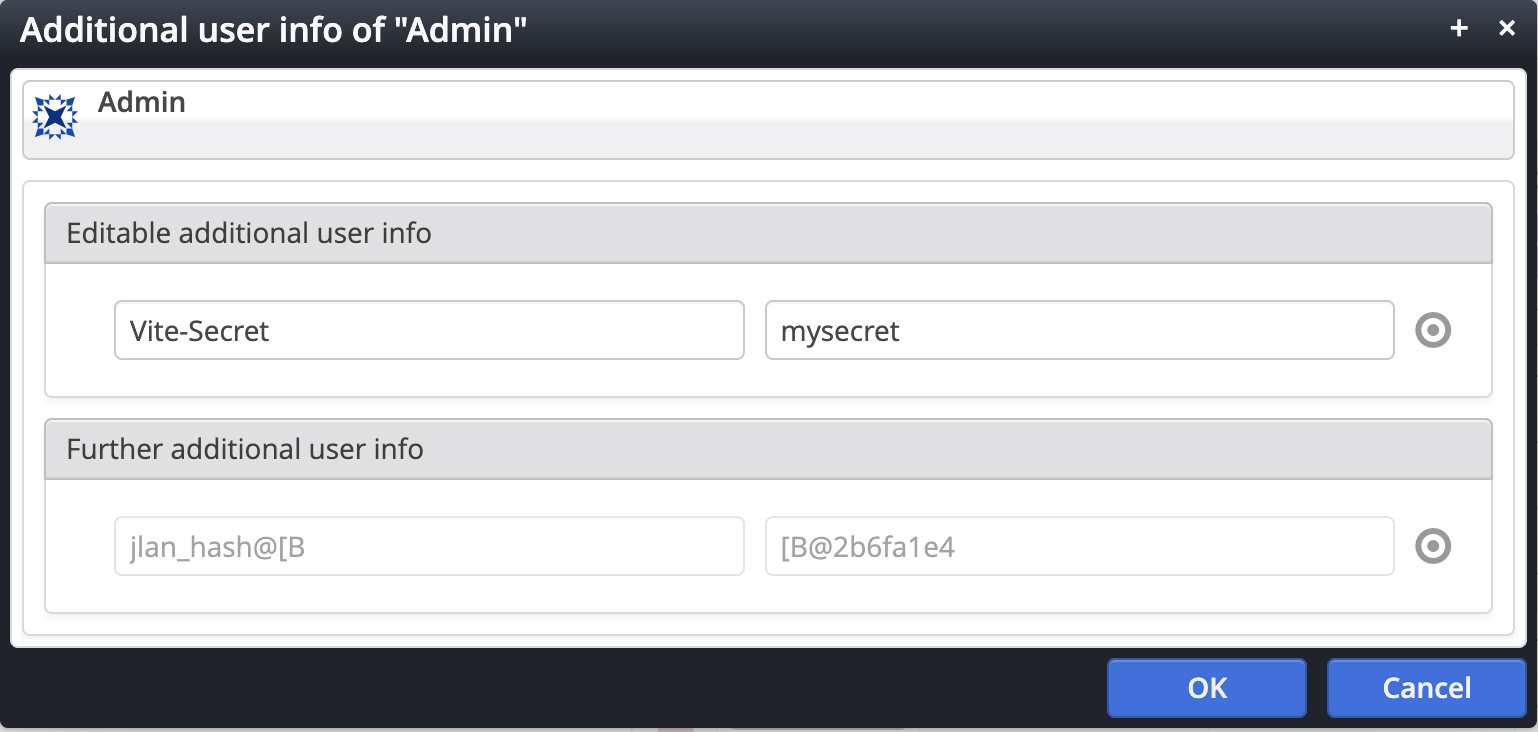
- Right click on the user name to open the context menu and select "Additional infos".
- In the dialog, either click the "Add" button or the "+" icon on the right side of an existing editable addional user info while hovering the "target" icon.
- In the new line, enter "Vite-Secret" as the key for the new entry and your secret string from the configuration file as value.
- Click "OK" to save the changes.
Working with Vite
Launch the Vite proxy
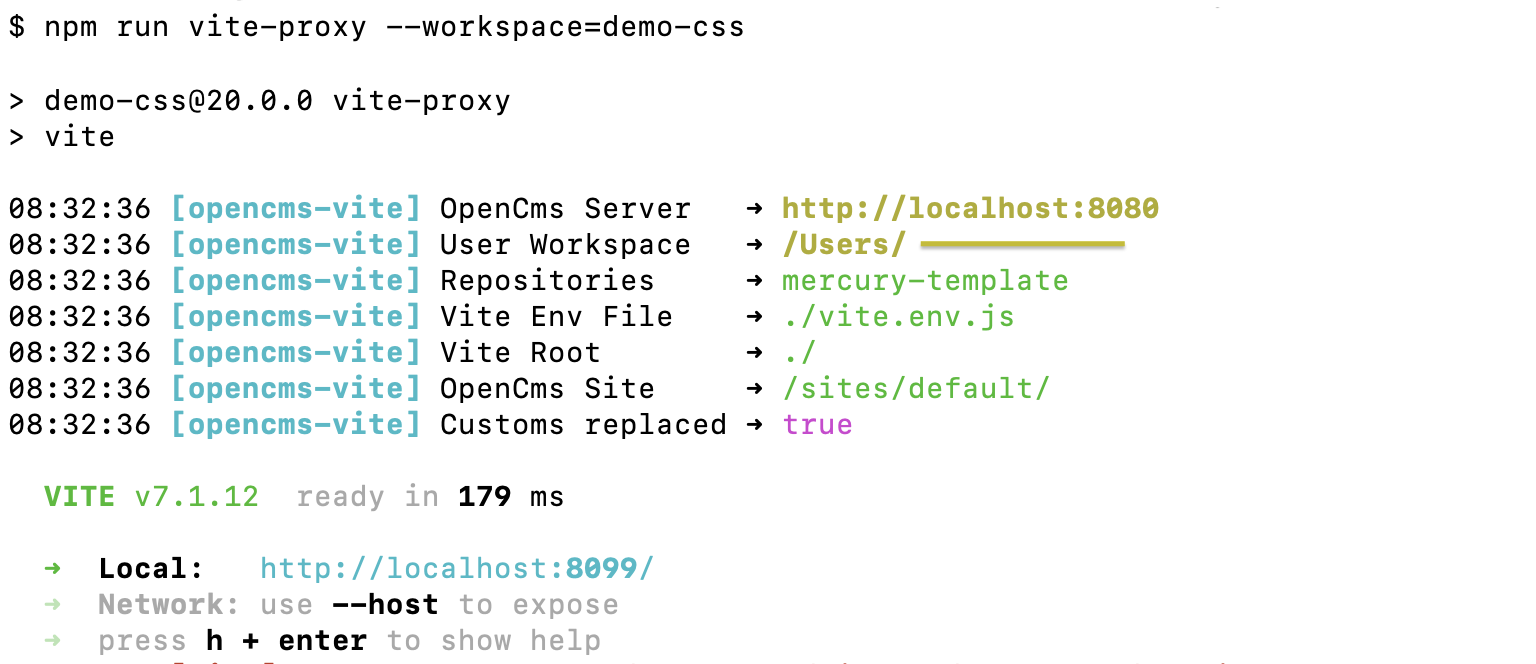
In your terminal window, launch the Vite proxy in the project folder using the following command:
npm run vite-proxy --workspace=demo-css
Note: the "workspace" argument specifies the current set of resources that you want to work with.
You should see an output containing your environment information and the server URL of the Vite proxy, usually "http://localhost:8099".
Login to OpenCms and work with Vite
Point your browser to the URL of the Vite proxy, followed by the OpenCms login path, usually "http://localhost:8099/system/login". Login to OpenCms with the user that has the Vite secret configured and switch to the site you configured in the Vite environment configuration.
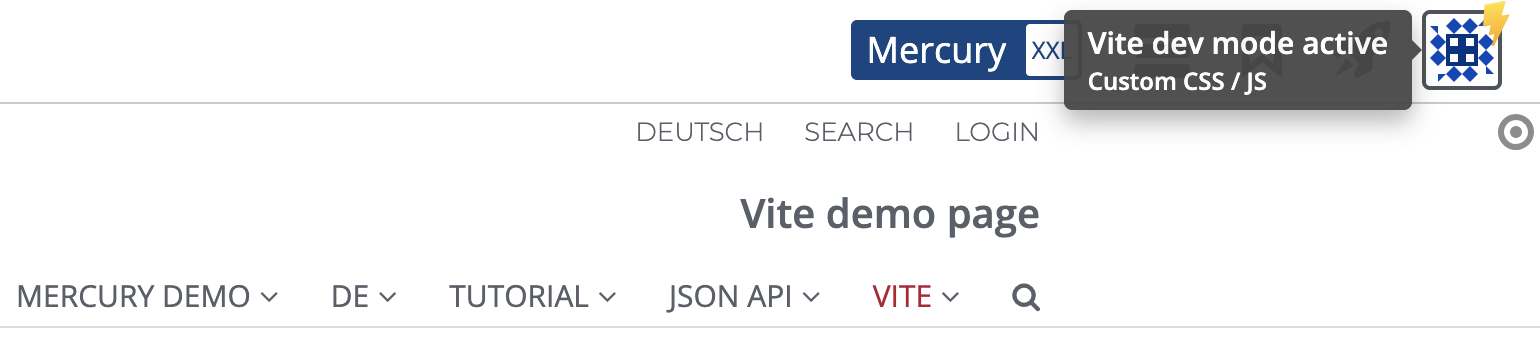
Open the Vite demo page in the page editor. The "User info" icon in the top right corner should now have a yellow bolt overlay that provides additional information when hovering it. This indicates that the Vite development mode is currently active for this page.
Check if the Vite development works

If you followed the instructions and configured the Mercury default demo as Vite site, you can now edit the custom CSS and JavaScript files to check if Vite works correctly.
- The corresponding files are located in the "css/" and "js/" subfolders of the project "demo-css/" subfolder.
- In these folders, the folder and file structure has to be identical to the file paths you want to modify in OpenCms, i.e. the CSS is placed in the folder "mercury-examples/custom-demo/custom.css".
- Edit the custom CSS file with an editor of your choice.
- Find the line with "background-color: lightcyan;".
- Change the color value "lightcyan" to another value, e.g. "burlywood".
- Save your changes.
The page preview should be immediately updated automatically to show the changed background color. Now you are ready to develop your custom styles for Mercury.
For working with the custom JavaScript, the procedure is almost identical:
- Edit the custom JS file "mercury-examples/custom-demo/custom.js" with an editor of your choice.
- Add the following code to the file after line 9 in the ""mousevover" event listener function before the closing bracket: "alert('Hello from Vite');".
- Save your changes.
The page is automatically reloaded by the Vite proxy. After that, you can hover the text box demonstrating the custom JavaScript usage with your mouse and check if your added alert message is correctly shown.
Please note: after finishing development, you still have to manually update the custom CSS and JS files in your OpenCms development system to persist the changes.
Conclusion
Congratulations, you can now use Vite to develop custom CSS and JS files for Mercury.
The next step is to create your own theme CSS for Mercury that you can use for your website layout. The necessary steps will be described in a dev blog that is coming soon.